Home
Roact-Animate is a powerful library to allow animating your Roact components. Under the hood, Roact-Animate uses TweenService, allowing animations to be performed in a very performant fashion.
Installation
Currently the recommended way to install Roact-Animate is by cloning the library and syncing it into Studio with Rojo. For more information on how to achieve this, please refer to the Rojo documentation.
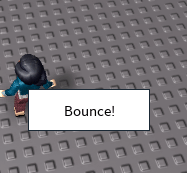
Walkthrough: Bouncing button
Let's take a look at using Roact-Animate to make a button that bounces when you click it:
The only module that we need to require is the root Roact-Animate module (plus Roact, of course!). After that, we want to create a new stateful component:
Warning
You must use Roact-Animate in stateful components. Roact-Animate animations are stateful by nature; additionally, stateful components are the only components with access to lifecycle hooks, which you often need in order to run your animations!
local BouncingButton = Roact.PureComponent:extend("BouncingButton")
In the component's init method, we create a Value for the button's position. A Value is a container for a normal Lua value that can be animated. You can use a Value to animate multiple actual objects, or just one.
function BouncingButton:init()
    self._position = RoactAnimate.Value.new(
        -- Use the Position property if it's given...
        self.props.Position
        -- ...or default to this position.
        or UDim2.new(0, 0, 0, 0)
    )
end
When rendering, we have to use special animated components: primitive components wrapped by Roact-Animate to allow their properties to be animated. Roact-Animate provides built-in animated components for the common GuiObjects:
- Frame
- ScrollingFrame
- TextLabel
- TextButton
- TextBox
- ImageLabel
- ImageButton
If there's a Roblox instance you want to animate that Roact-Animate doesn't provide, you can use the makeAnimatedComponent function.
Moving along, in our render function, we need to use the animated TextButton component provided by Roact-Animate. Animated components let you supply a Value as one of their properties - this allows you to animate that property. Here, we want to move the button, so we set its Position property to the Value we created in init.
function BouncingButton:render()
    return Roact.createElement(RoactAnimate.TextButton, {
        -- Use a Value to make the property animateable.
        Position = self._position,
        -- Everything else can't be animated!
        BackgroundColor3 = Color3.new(1, 1, 1),
        Font = Enum.Font.SourceSans,
        Size = UDim2.new(0, 120, 0, 40),
        Text = "Bounce!",
        TextColor3 = Color3.new(0, 0, 0),
        TextSize = 18,
    })
end
We've scaffolded everything we need to make the button bounce. Now, we need to start the animation when we click it! We'll do this in an event listener.
To make an animation, you have three options:
- Call
RoactAnimatewith the animation you want to run - Call
RoactAnimate.Sequencewith a table of the animations you want to run one at a time - Call
RoactAnimate.Parallelwith a table of the animations you want to run all at once
We're going to do two animations: one to raise the button up, and another to have it bounce down. We want to do these one at a time, so we need to use RoactAnimate.Sequence. Sequence takes a list of animations and plays them one at a time, starting from the first animation given.
To create animations for Sequence to work with, we need to use RoactAnimate, which takes three arguments:
- The
Valueto animate - The TweenInfo to use for this animation
- The actual value to animate to
The two animations are very simple:
RoactAnimate(self._position, TweenInfo.new(0.125), self.props.Position - UDim2.new(0, 0, 0, 10))
RoactAnimate(self._position, TweenInfo.new(
    0.5,
    Enum.EasingStyle.Bounce
), self.props.Position)
We can wrap both of them in a table for Sequence:
RoactAnimate.Sequence({
    RoactAnimate(self._position, TweenInfo.new(0.125), self.props.Position - UDim2.new(0, 0, 0, 10)),
    RoactAnimate(self._position, TweenInfo.new(
        0.5,
        Enum.EasingStyle.Bounce
    ), self.props.Position),
})
To start an animation, we call its Start method. We don't need to capture the animation in a variable, so we can just call the return value of Sequence directly:
RoactAnimate.Sequence({
    RoactAnimate(self._position, TweenInfo.new(0.125), self.props.Position - UDim2.new(0, 0, 0, 10)),
    RoactAnimate(self._position, TweenInfo.new(
        0.5,
        Enum.EasingStyle.Bounce
    ), self.props.Position),
}):Start()
Now, we tie all of that together in an event listener on the button:
function BouncingButton:render()
    return Roact.createElement(RoactAnimate.TextButton, {
        -- Use a Value to make the property animateable.
        Position = self._position,
        -- Everything else can't be animated!
        BackgroundColor3 = Color3.new(1, 1, 1),
        Font = Enum.Font.SourceSans,
        Size = UDim2.new(0, 120, 0, 40),
        Text = "Bounce!",
        TextColor3 = Color3.new(0, 0, 0),
        TextSize = 18,
        [Roact.Event.MouseButton1Click] = function()
            RoactAnimate.Sequence({
                RoactAnimate(self._position, TweenInfo.new(0.125), self.props.Position - UDim2.new(0, 0, 0, 10)),
                RoactAnimate(self._position, TweenInfo.new(
                    0.5,
                    Enum.EasingStyle.Bounce
                ), self.props.Position),
            }):Start()
        end,
    })
end
You can find the full code in the examples folder.